Overview
Router Station is the official tool of the Router chain. It helps with wallet management, cosmwasm contract deployment, execution, queries, and other contract lifecycle-related processes.
To deploy a smart contract on the Router chain there is a requirement to create a wasm build of the smart contract.
Please refer to the following document to learn how to create the wasm build.
1. Add a Router Account on the Router Station
To use the Router Station UI for any operation related to the contract life-cycle process( except the contract read query), you need to have at least one account added in the Router Station. To add an account in the Router Station, you need to follow the below mentioned steps or you can also follow the video.
- Click on the “Add Account” button
- In the pop-up, fill the “Label” & “Mnemonic” text areas. You can also click on the refresh button to get a new Mnemonic.
- Now, click on the “Add” button. and your account is added to the Router Station.
- You can follow the same process for multiple accounts here.
2. Add an existing smart contract
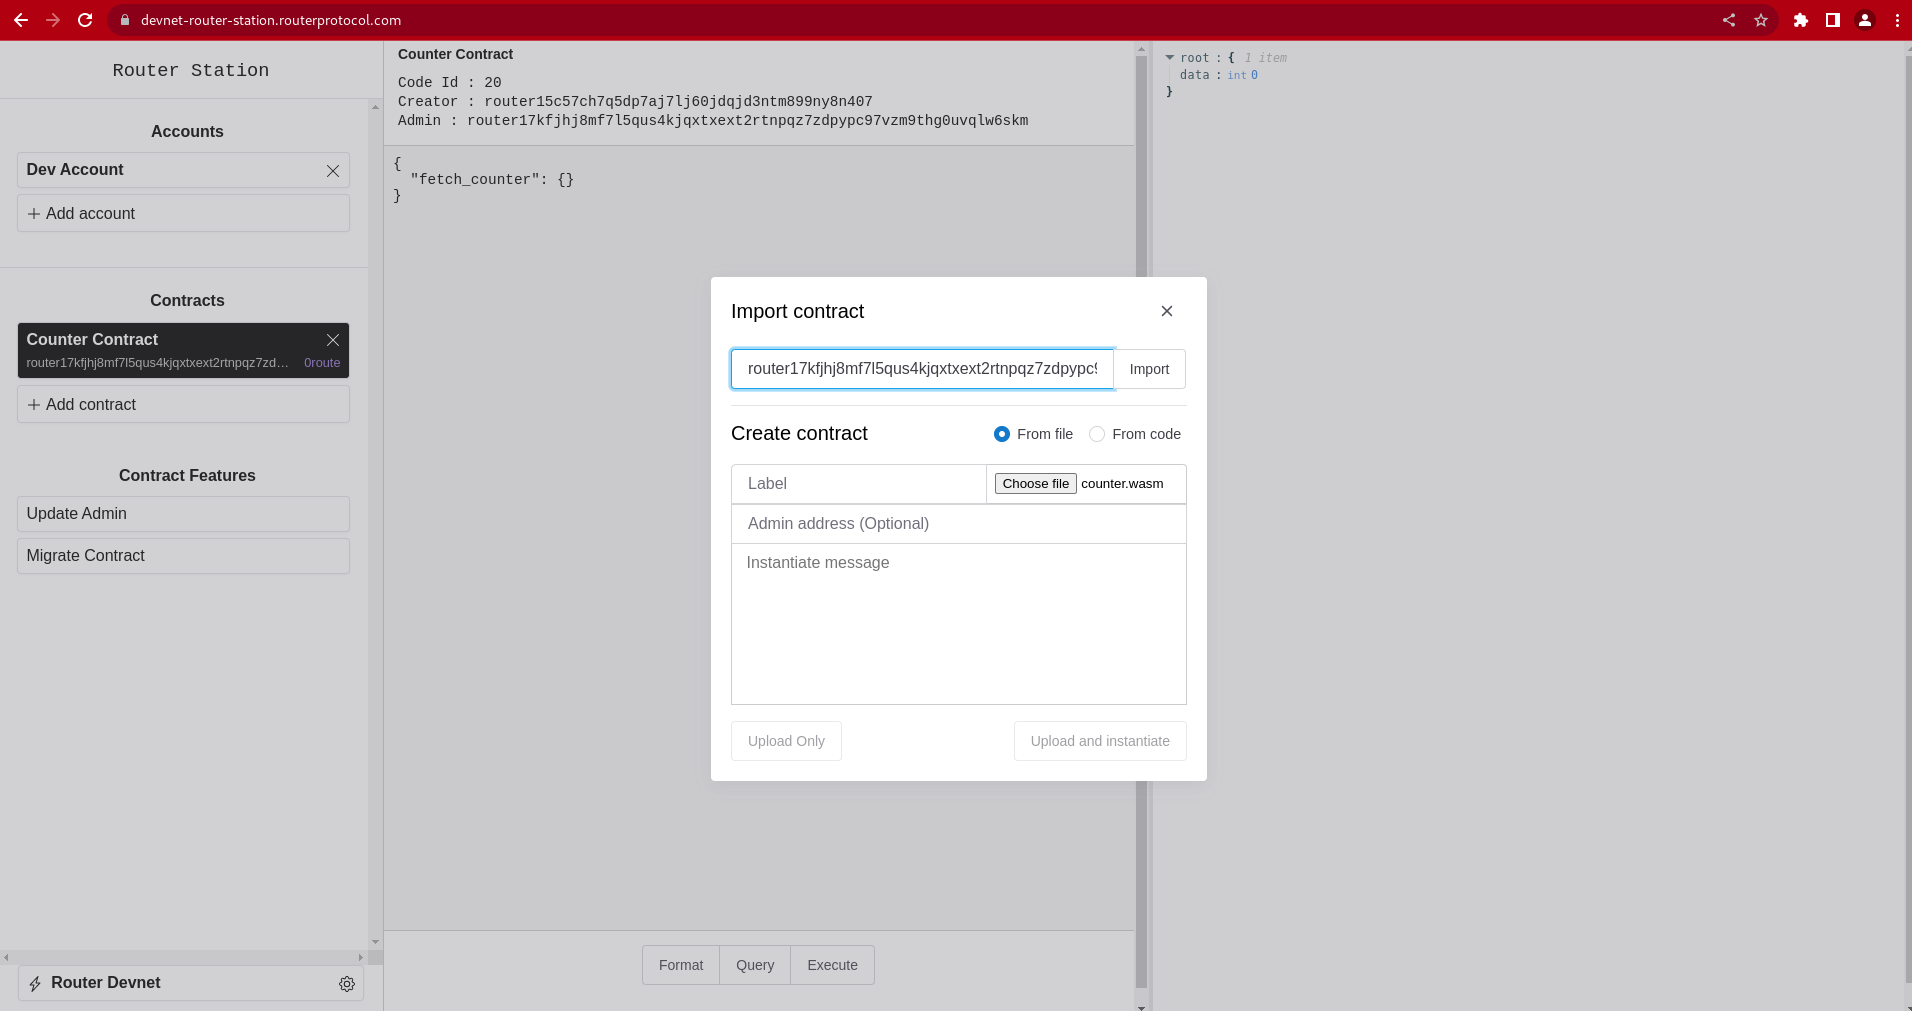
You can add an existing cosmwasm contract in the Router Station. To add an existing contract address, you need to click on the “+Add contract” button. A pop-up shows up. The router contract address can be added in the Import contract text field and can be imported for further action.
3. Upload wasm Contract
The Router chain is a cosmos chain. To deploy a smart contract first, you need to upload the contract’s wasm file on the chain. On Router Station to upload a wasm file, you need to follow the below mentioned steps or you can also follow the video.
- Click on the “+Add Contract” button. It will open up one pop-up.
- Here, you need to select the wasm file.
- Then click on the “Upload Only” button.
Once the upload button is clicked an Uploading Contract toast msg can be seen, which signifies that the contract upload is happening in the background.
After the successful transaction, a success toast message can be seen with the Uploaded code Id to the right.
4. Upload wasm contract and Instantiate
In Router Chain, you can create a new contract by instantiating a deployed code id. If you don’t have a deployed code id preset then you can deploy and instantiate the contract otherwise instantiate the contract by using the existing deployed code id.
You provide both functionalities on the Router Station.
To deploy and instantiate a smart contract first, you need to follow the below mentioned steps or you can also follow the video.
- Click on the “+Add Contract” button. It will open up one pop-up.
- First, you need to select the “From file” radio button.
- You need to fill the “Label” text box and instantiate the message.
- The admin field is optional. If it is empty our admin will be null and that makes the contract immutable.
- Here, you also need to select the wasm file.
- Then click on the “Upload and Instantiate” button.
Once the upload and instantiate button is clicked upon, an Uploading Contract toast message can be seen. This signifies that the uploading of the contract is happening in the background.
Right after uploading is successful, the uploaded contract’s code id and instantiating contract toast msg can be seen. This signifies that the instantiation of the contract is happening in the background.
After successful instantiation of the contract, a success toast with the instantiated contract address can be seen, in it to the right and that particular contract added on to the left side under the Contracts section can be seen.
5. Execute transaction and Query operation on the added contract
A cosmwasm contract has multiple execute or query messages. The execute message can read and write the contract states, but the query messages can only read contract storage. That is why to perform execute messages you need to have a user account, but not for the query messages.
In the Router station, you need to select one contract on which you want to perform the operation. Then you can write down the JSON query in the text section as shown in the video. Now, according to the query type you can hit either the “Execute” or the “query” button. The output will be shown in the right section of the query. Please check out the video, In this video, you performed the message execution and query for the Counter contract. link?
6. Contract Migration
Cosmwasm contracts can be upgraded. To upgrade a cosmwasm smart contract, you need to satisfy two conditions. The contract should support migration and its admin address should not be null. To migrate the contract, you need to follow the below mentioned steps or you can also follow the video.
- Select the contract that needs to be migrated.
- Click on the “Migrate Contract” button. It will open one pop-up.
- Provide the new code id and the “migration message”.
- Now, Click on the “migrate” button. It will submit the migration message on the chain.
Upon, the successful transaction you will able to see the updated code id in the contract info section.
7. Contract Admin Update
Cosmwasm contracts have an admin address. It is provided at the time of instantiation of the contract. It decides the contract’s immutability. If it is null, the contact is immutable.
To update the contract’s admin address, you need to follow the below mentioned steps or you can also follow the video.
- Select the contract that needs to be updated.
- Click on the “Update Admin” button. It will open one pop-up.
- Provide the new admin address or leave it empty( if you want to set the admin address to null).
- Now, Click on the “update” button. It will submit the update admin message on the chain.
Upon, the successful transaction you will able to see the updated admin address in the contract info section.