Your First Contract
This section will provide a step-by-step guide for first-time users to compile and deploy their first CosmWasm contract on the Router chain.
Step 1) Installing Prerequisites
If you haven't already, kindly install the required tools/technologies to interact with the Router chain.
Step 2) Setting up an Account
Before setting up an account to interact with the Router chain, verify that the testnet is live and the following links are working for you:
Method 1: Via the UI
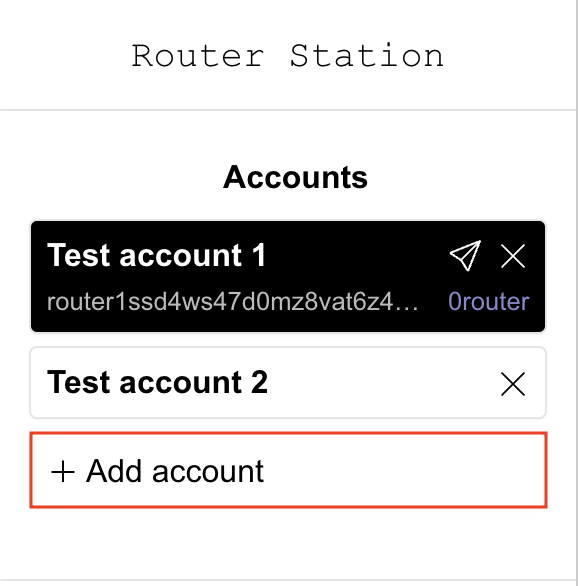
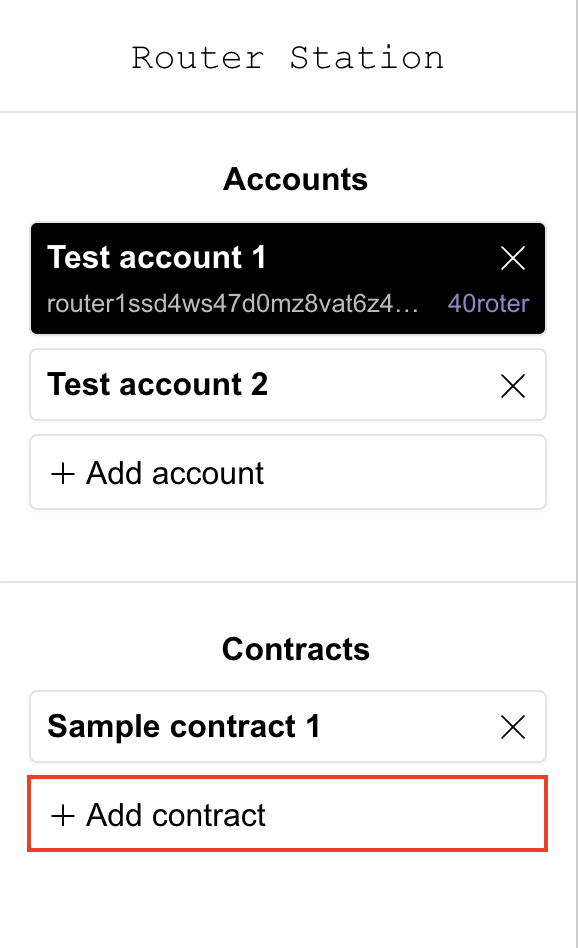
Step 1) Go directly to the Router station and click on Add account.
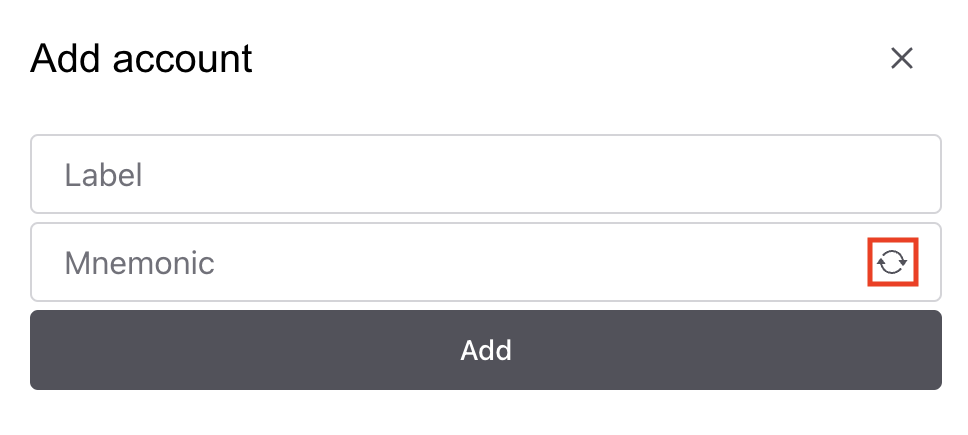
Step 2) Click on the refresh button on the right-hand side of the Mnemonic textbox to generate a new mnemonic.
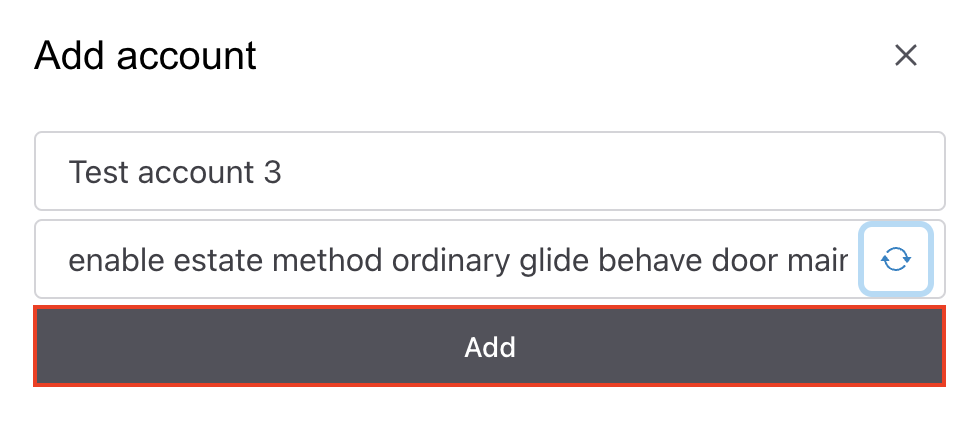
Step 3) Click on the Add button to create a new account.
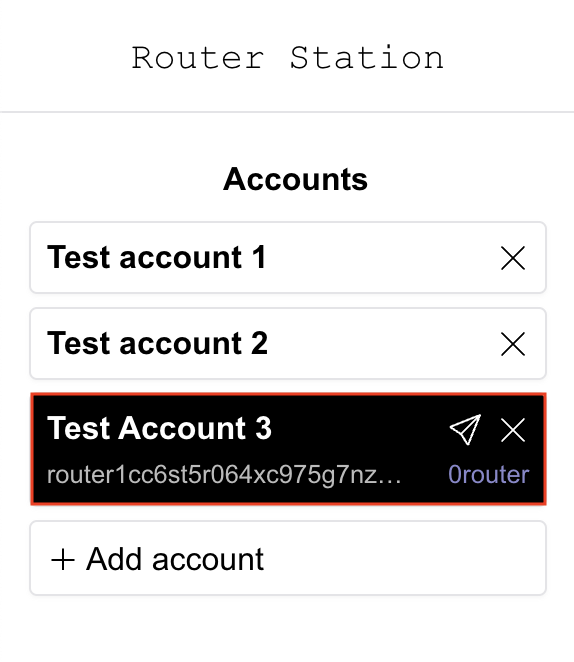
Following this step, a new account will be created and displayed under the Accounts section.
Step 4) Now, you can go to this faucet to get some devnet tokens on the address generated in the previous step.
Method 2: Via Router CLI
If you are more comfortable with CLI commands and you will be deploying contracts directly using the CLI, this method should be preferred. Before starting, ensure that you have routerd installed and updated to the latest version. If not, follow the guide given here to install routerd. Now, to set up a wallet using CLI, follow these steps:
Step 1) Set up a wallet address using the following command:
routerd keys add wallet
Step 2) After running this command, you'll be asked for a keyring passphrase. Use 12345678 as the passphrase.
After entering the passphrase, you should be shown the following response:
- name: wallet
  type: local
  address: router1ssd4ws47d0mz8vat6z4jzg69ezq8y6s6kkk25q
  pubkey: '{"@type":"/routerprotocol.routerchain.crypto.ethsecp256k1.PubKey","key":"A7H6PeN9c+b7NY+/op3TWf44IEsa14vC70U9dFzSSYW6"}'
  mnemonic: ""

**Important** write this mnemonic phrase in a safe place.

It is the only way to recover your account if you ever forget your password.

state maple method glory expire draw eagle motor you kiss legend wild permit tank stumble seminar flag urge whisper edit arrow potato peasant height
Step 3) Now, you can go to this faucet to get some devnet tokens on the address generated in the previous step.
Step 4) [Optional] Add this account to the Router station by clicking on "Add account" and entering your mnemonic.
Step 3) Compiling an Optimized CosmWasm contract
In this section, we will download the code for a sample contract and compile it into an optimized wasm binary executable.
Compiling the Contract Code
Let's clone the repository in which we keep cw-contracts and compile the existing code for a simple name service contract that mimics a name service marketplace.
# cloning the repository
git clone https://github.com/InterWasm/cw-contracts
cd cw-contracts
git checkout main
cd contracts/nameservice

# compile the wasm contract
cargo wasm
A file - target/wasm32-unknown-unknown/release/cw_nameservice.wasm should be received as an output. This is a release build, but not stripped of all the unneeded code. To produce a much smaller version, you can run the following command, which tells the compiler to strip the unused parts of the code out:
RUSTFLAGS='-C link-arg=-s' cargo wasm
Unit Tests
Use the following command to run the unit tests:
RUST_BACKTRACE=1 cargo unit-test
After some compilation steps, you should see the following response:
running 15 tests
test tests::tests::proper_init_no_fees ... ok
test tests::tests::fails_on_register_insufficient_fees ... ok
test coin_helpers::test::assert_sent_sufficient_coin_works ... ok
test tests::tests::fails_on_register_wrong_fee_denom ... ok
test tests::tests::fails_on_register_already_taken_name ... ok
test tests::tests::fails_on_transfer_from_nonowner ... ok
test tests::tests::fails_on_transfer_insufficient_fees ... ok
test tests::tests::fails_on_transfer_non_existent ... ok
test tests::tests::proper_init_with_fees ... ok
test tests::tests::register_available_name_and_query_works ... ok
test tests::tests::register_available_name_fails_with_invalid_name ... ok
test tests::tests::returns_empty_on_query_unregistered_name ... ok
test tests::tests::register_available_name_and_query_works_with_fees ... ok
test tests::tests::transfer_works ... ok
test tests::tests::transfer_works_with_fees ... ok
test result: ok. 15 passed;  0 failed;  0 ignored;  0 measured;  0 filtered out;
Optimized Compilation
To reduce gas costs, the binary size should be as small as possible. This will result in a less costly deployment and lower fees for every interaction. Luckily, there is tooling to help with this. You can optimize production code using the rust-optimizer. rust-optimizer produces reproducible builds of CosmWasm smart contracts. This means third parties can verify that the contract is actually the claimed code.
You will need Docker installed in order to run rust-optimizer.
Naviaget to the project root (cw-contracts/contracts/nameservice) and make sure your Docker is running before initiating the following command:
On Mac/Linux
docker run --rm -v "$(pwd)":/code \
  --mount type=volume,source="$(basename "$(pwd)")_cache",target=/code/target \
  --mount type=volume,source=registry_cache,target=/usr/local/cargo/registry \
  cosmwasm/workspace-optimizer:0.12.13
On an arm64 Machine (e.g. Apple's M1, M2)
docker run --rm -v "$(pwd)":/code \
  --mount type=volume,source="$(basename "$(pwd)")_cache",target=/code/target \
  --mount type=volume,source=registry_cache,target=/usr/local/cargo/registry \
  cosmwasm/workspace-optimizer-arm64:0.12.13
On Windows 10
docker run --rm -v ${pwd}:/code `
  --mount type=volume,source="$("$(Split-Path -Path $pwd -Leaf)")_cache",target=/code/target `
  --mount type=volume,source=registry_cache,target=/usr/local/cargo/registry `
  cosmwasm/rust-optimizer:0.12.13e
Following this command, a new wasm binary will be created under the folder artifacts.
Step 4) Deploying and Instantiating your Contract
Now that we have the wasm binary ready, we can deploy it to the devnet and start interacting. You can use the UI or the routerd Go CLI.
Method 1: Via the UI
Deploying and Instantiating the Contract
Step 1) Go to the Router station and click on Add contract.
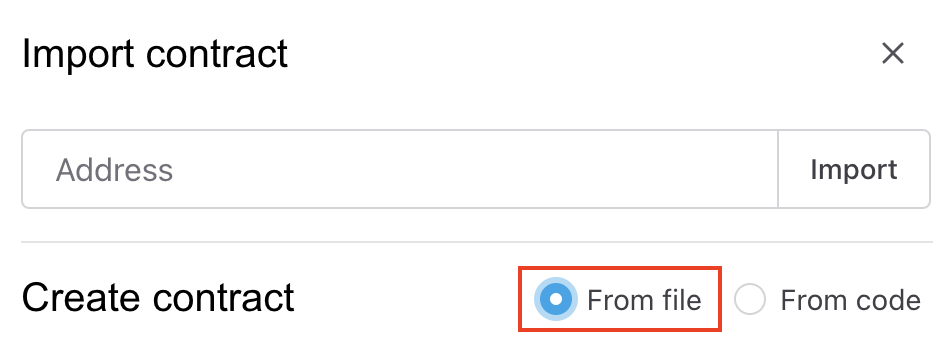
Step 2) Choose the From file option and upload your cw_nameservice.wasm file.
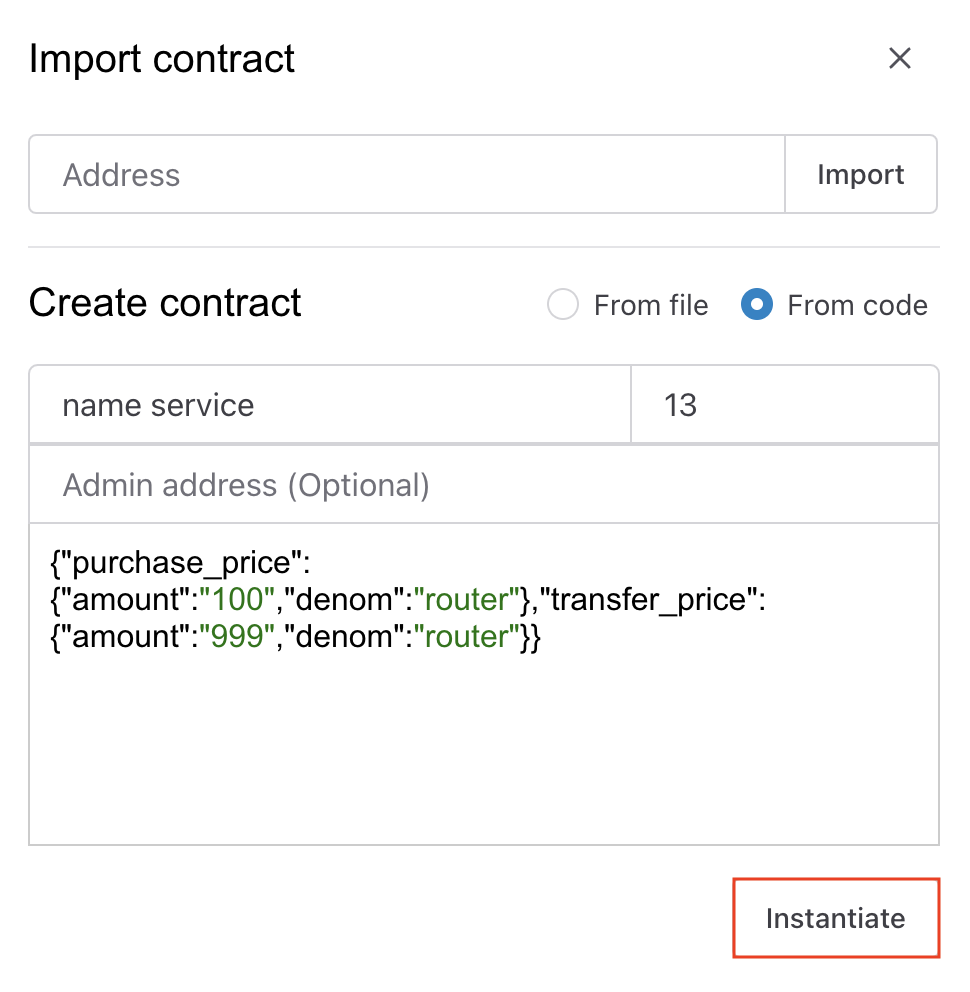
Step 3) Add a label and the following instantiation message:
{"purchase_price":{"amount":"100","denom":"router"},"transfer_price":{"amount":"999","denom":"router"}}
Step 4) Click on the Upload and Instantiate button.

Please do not cancel/refresh while the contract gets deployed and instantiated.
Instantiating an Already Deployed Contract
Step 1) Go to the Router station and click on Add contract.
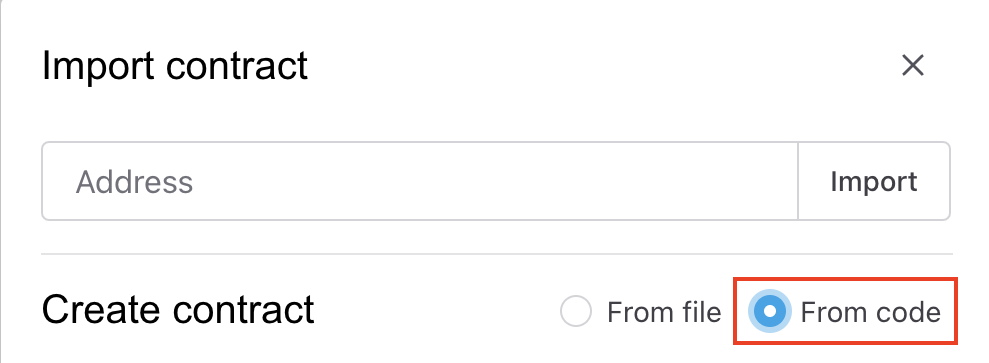
Step 2) Choose the From code option and add your contract Code Id.
Step 3) Add a label and your instantiation message and click on the Instantiate button.
Following this step, your newly instantiated contract will be visible under the Contracts section.

Method 2: Via Router CLI
Part 1 - Deploying the Contract
Step 1) Store the bytecode on the Router chain and acquire the Code Id. The Code Id will later be used to create an instance of the cw_namespace contract.
RES=$(routerd tx wasm store cw_nameservice.wasm --from wallet --node https://tm.rpc.testnet.routerchain.dev:443 --chain-id router-1 --gas-prices 225000router --gas auto --gas-adjustment 1.3 -y --output json -b block)
# The response contains the Code Id of the uploaded wasm binary.
echo  $RES
Step 2) Check the list of contracts instantiated using the Code Id above.
routerd query wasm list-contract-by-code <your-code-id> --node https://tm.rpc.testnet.routerchain.dev:443 --output json
The response should be an empty list, as we have not instantiated any contract yet:
{"contracts":[],"pagination":{"next_key":null,"total":"0"}}
Step 3) Before we instantiate a contract with the Code Id and interact with it, let us check if the code stored on the blockchain is indeed the cw_namespace.wasm binary we uploaded.
# Download the wasm binary from the chain and compare it to the original one
routerd query wasm code <your-code-id> --node https://tm.rpc.testnet.routerchain.dev:443 download.wasm
# The two binaries should be identical (first change directory to go the to the folder which has the cw_nameservice.wasm file, then run the following command)
diff cw_nameservice.wasm download.wasm
Part 2 - Instantiating the Contract
Step 1) Prepare the instantiation message
INIT='{"purchase_price":{"amount":"100","denom":"router"},"transfer_price":{"amount":"999","denom":"router"}}'
Step 2) Instantiate the contract
NODE=(--node https://tm.rpc.testnet.routerchain.dev:443)
TXFLAG=($NODE --chain-id router-1 --gas-prices 225000router --gas auto --gas-adjustment 1.3)
routerd tx wasm instantiate <your-code-id>  "$INIT" --from wallet --label "name service"  $TXFLAG -y --no-admin
Step 3) After running the aforementioned command, you'll be asked for a keyring passphrase. Use 12345678 as the passphrase.
Upon instantiation, the cw_nameservice contract will store the instantiation message data in the contract's storage with the storage key config.