Deploying a Sample Cross-Chain NFT Contract
This section describes how to deploy your NFT smart contract on different EVM-chains and test it by actually transferring your NFTs cross-chain.
STEP 3) Deploy your NFT Contract
1) Compile your NFT contract
Step 1) Go to https://remix.ethereum.org/
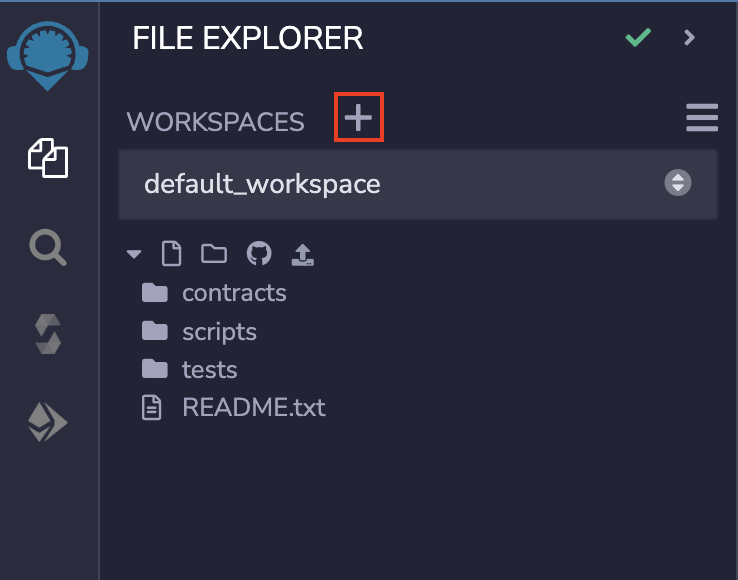
Step 2) In the File Explorer pane, click on the plus icon under the Workspaces tab to create a new workspace.
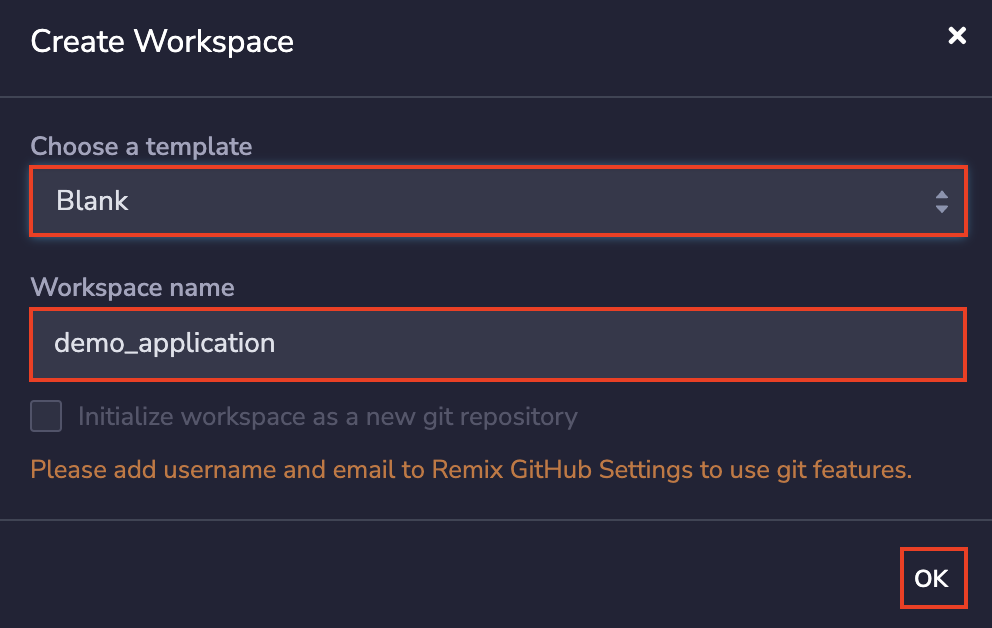
Step 3) Under the template option, choose Blank, give your workspace an appropriate name and then click on OK.
Step 4) In your new workspace, create a new file by the name of XERC1155.sol.

Step 5) Copy the smart contract mentioned in STEP 1) and paste it into XERC1155.sol.
Step 6) Click on the Solidity compiler icon (the one shaped like an S), check that your compiler version is within the versions specified in the pragma solidity statement, and click on Compile HelloRouter.sol.
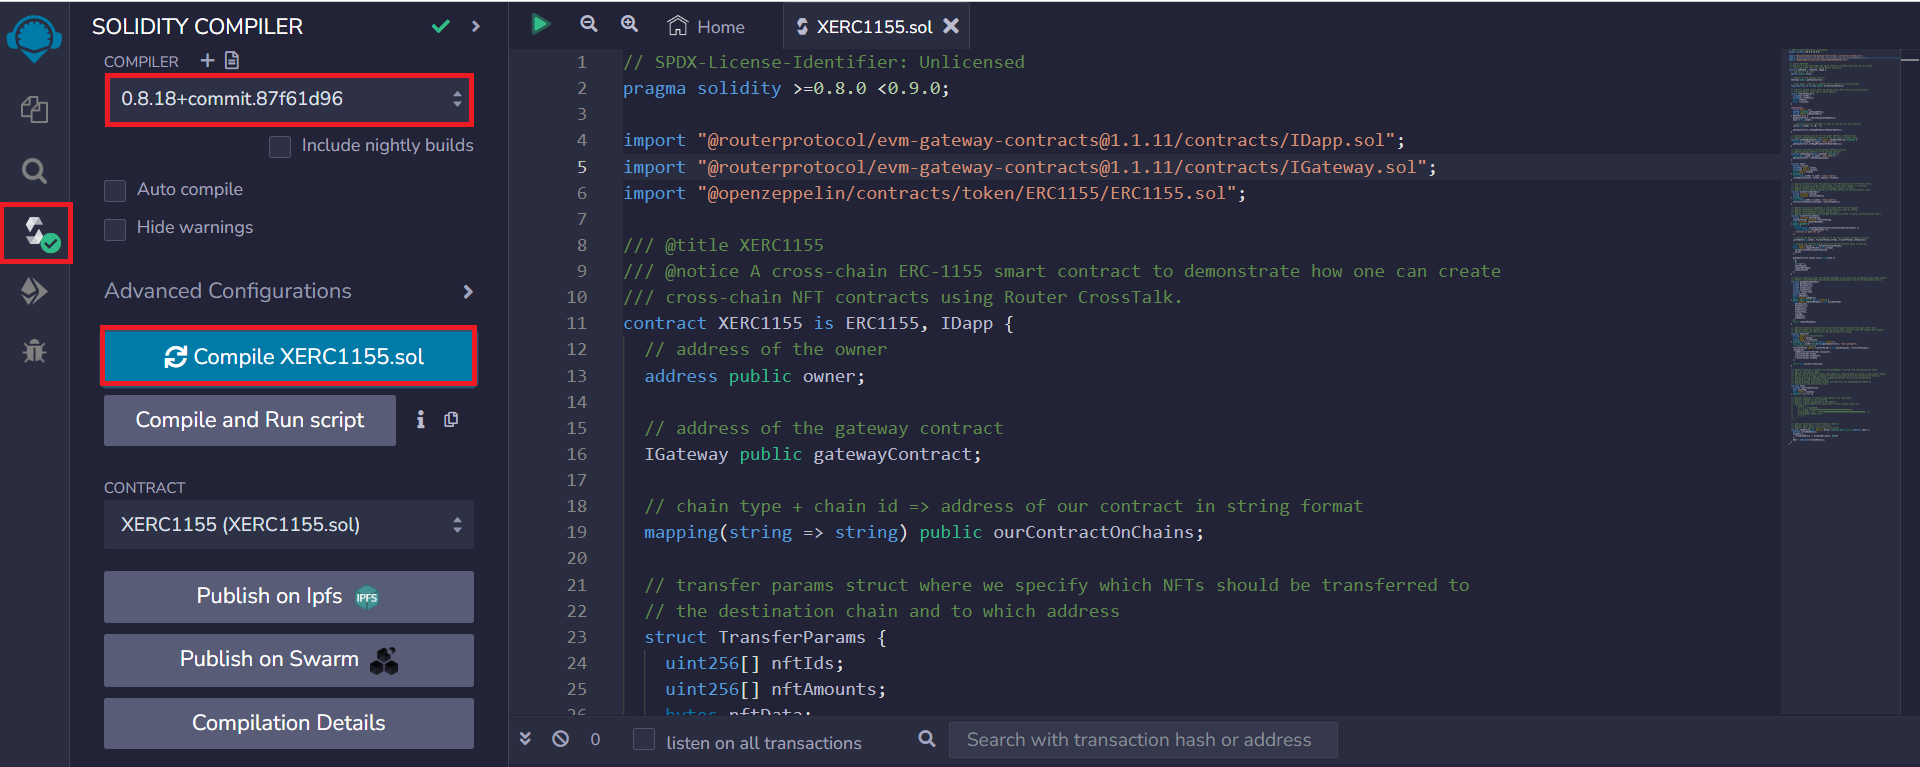
Once compiled, you should see a green tick mark over the Solidity compiler icon.
2) Deploy the Compiled Contract
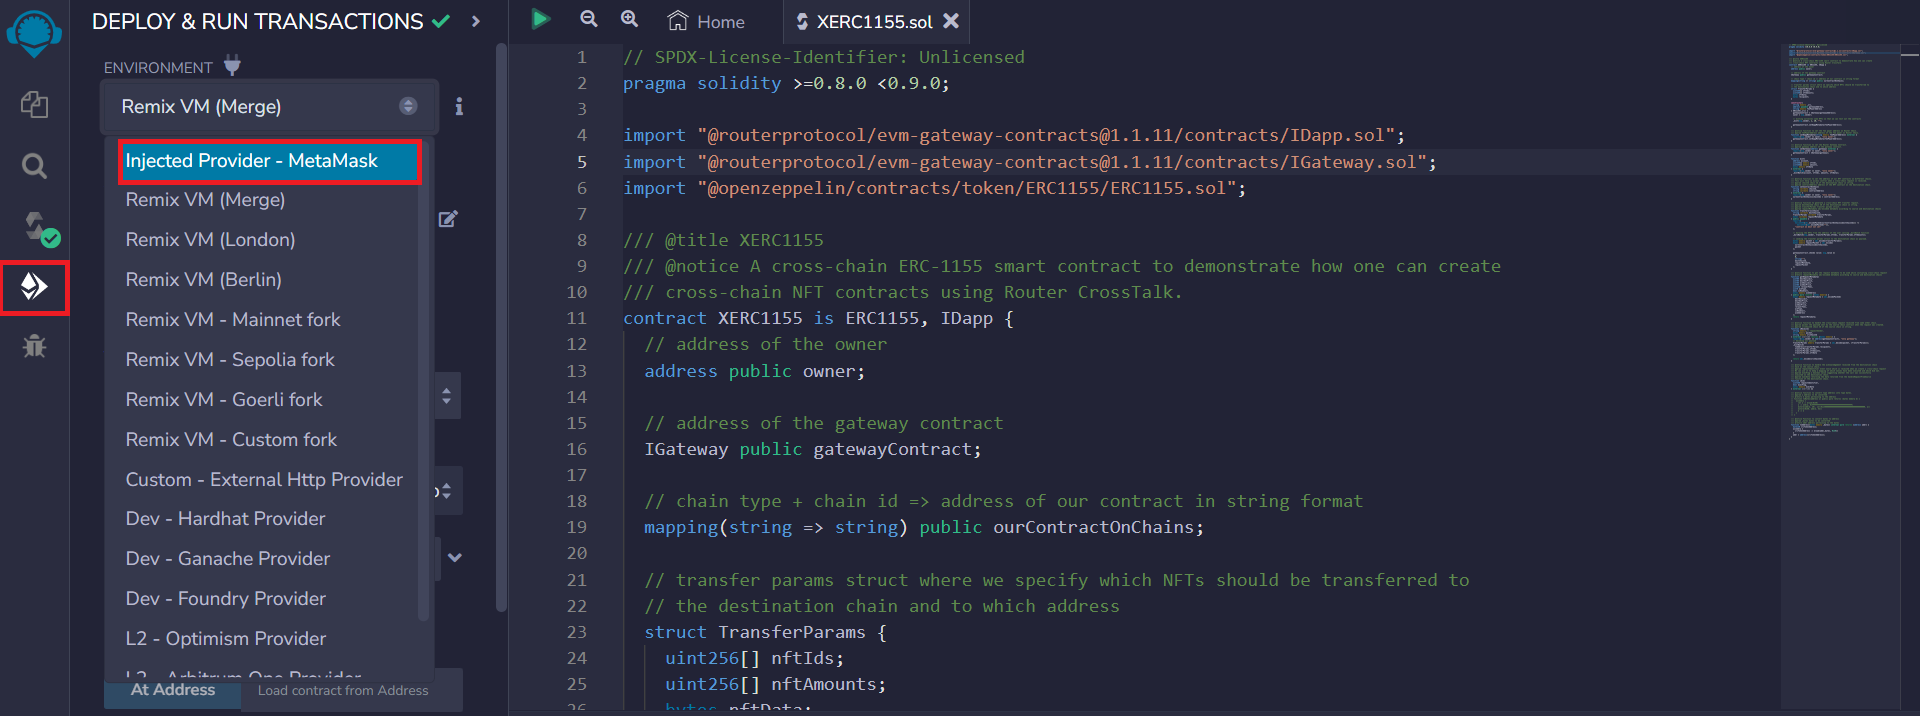
Step 1) Click on the Deploy & run transactions icon (the one with the Ethereum logo) and select Injected Provider - Metamask as the Environment.
Step 2) A MetaMask window will pop up following the previous step. Connect with your wallet and confirm.
Step 3) Add the gateway address for respective chains from here, your wallet address(it can be EVM wallet address or router wallet address) and URI for the NFT contract, click on Deploy and sign the transaction in your MetaMask.
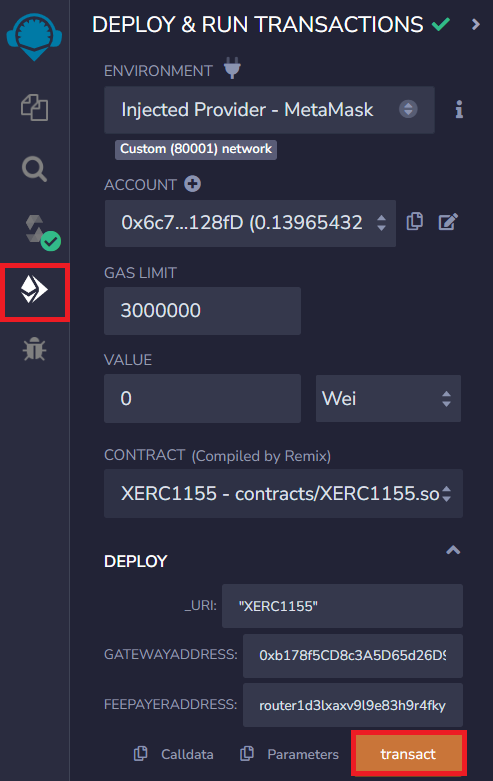
Sometimes the contract deployment fails due to low gas fees, so make sure to edit the gas fees while signing the transaction in your wallet.

STEP 4) Fee-payer approval and contract configuration
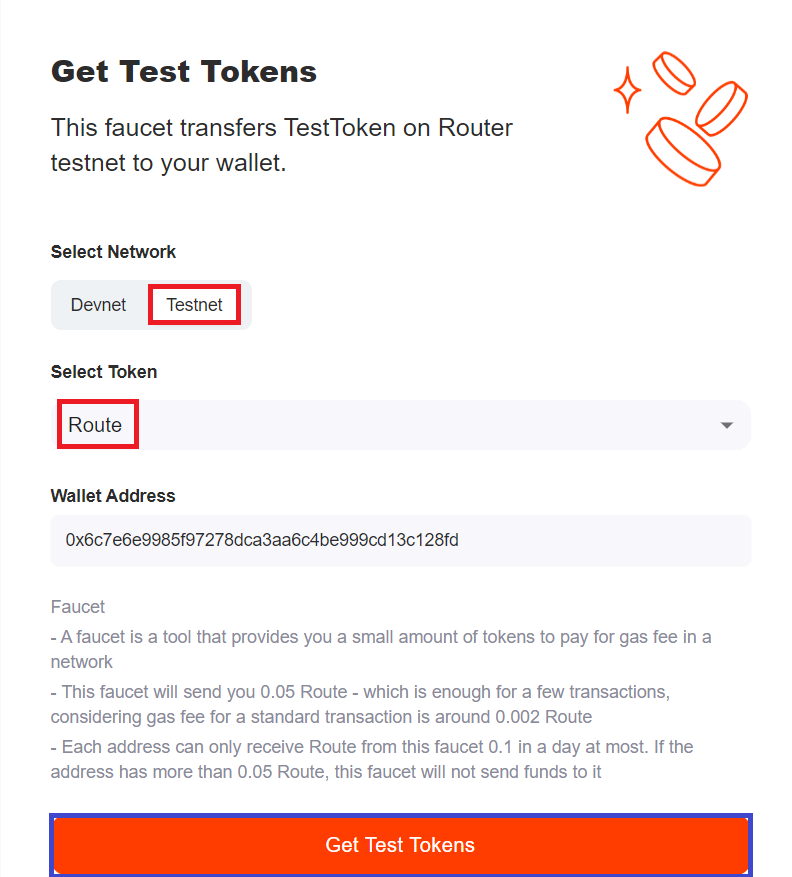
1) Get funds in your wallet from Router-faucet
Go to https://faucet.testnet.routerchain.dev, connect your metamask wallet, select network as Testnet, select token as ROUTE, paste your wallet address and get test tokens into your account.
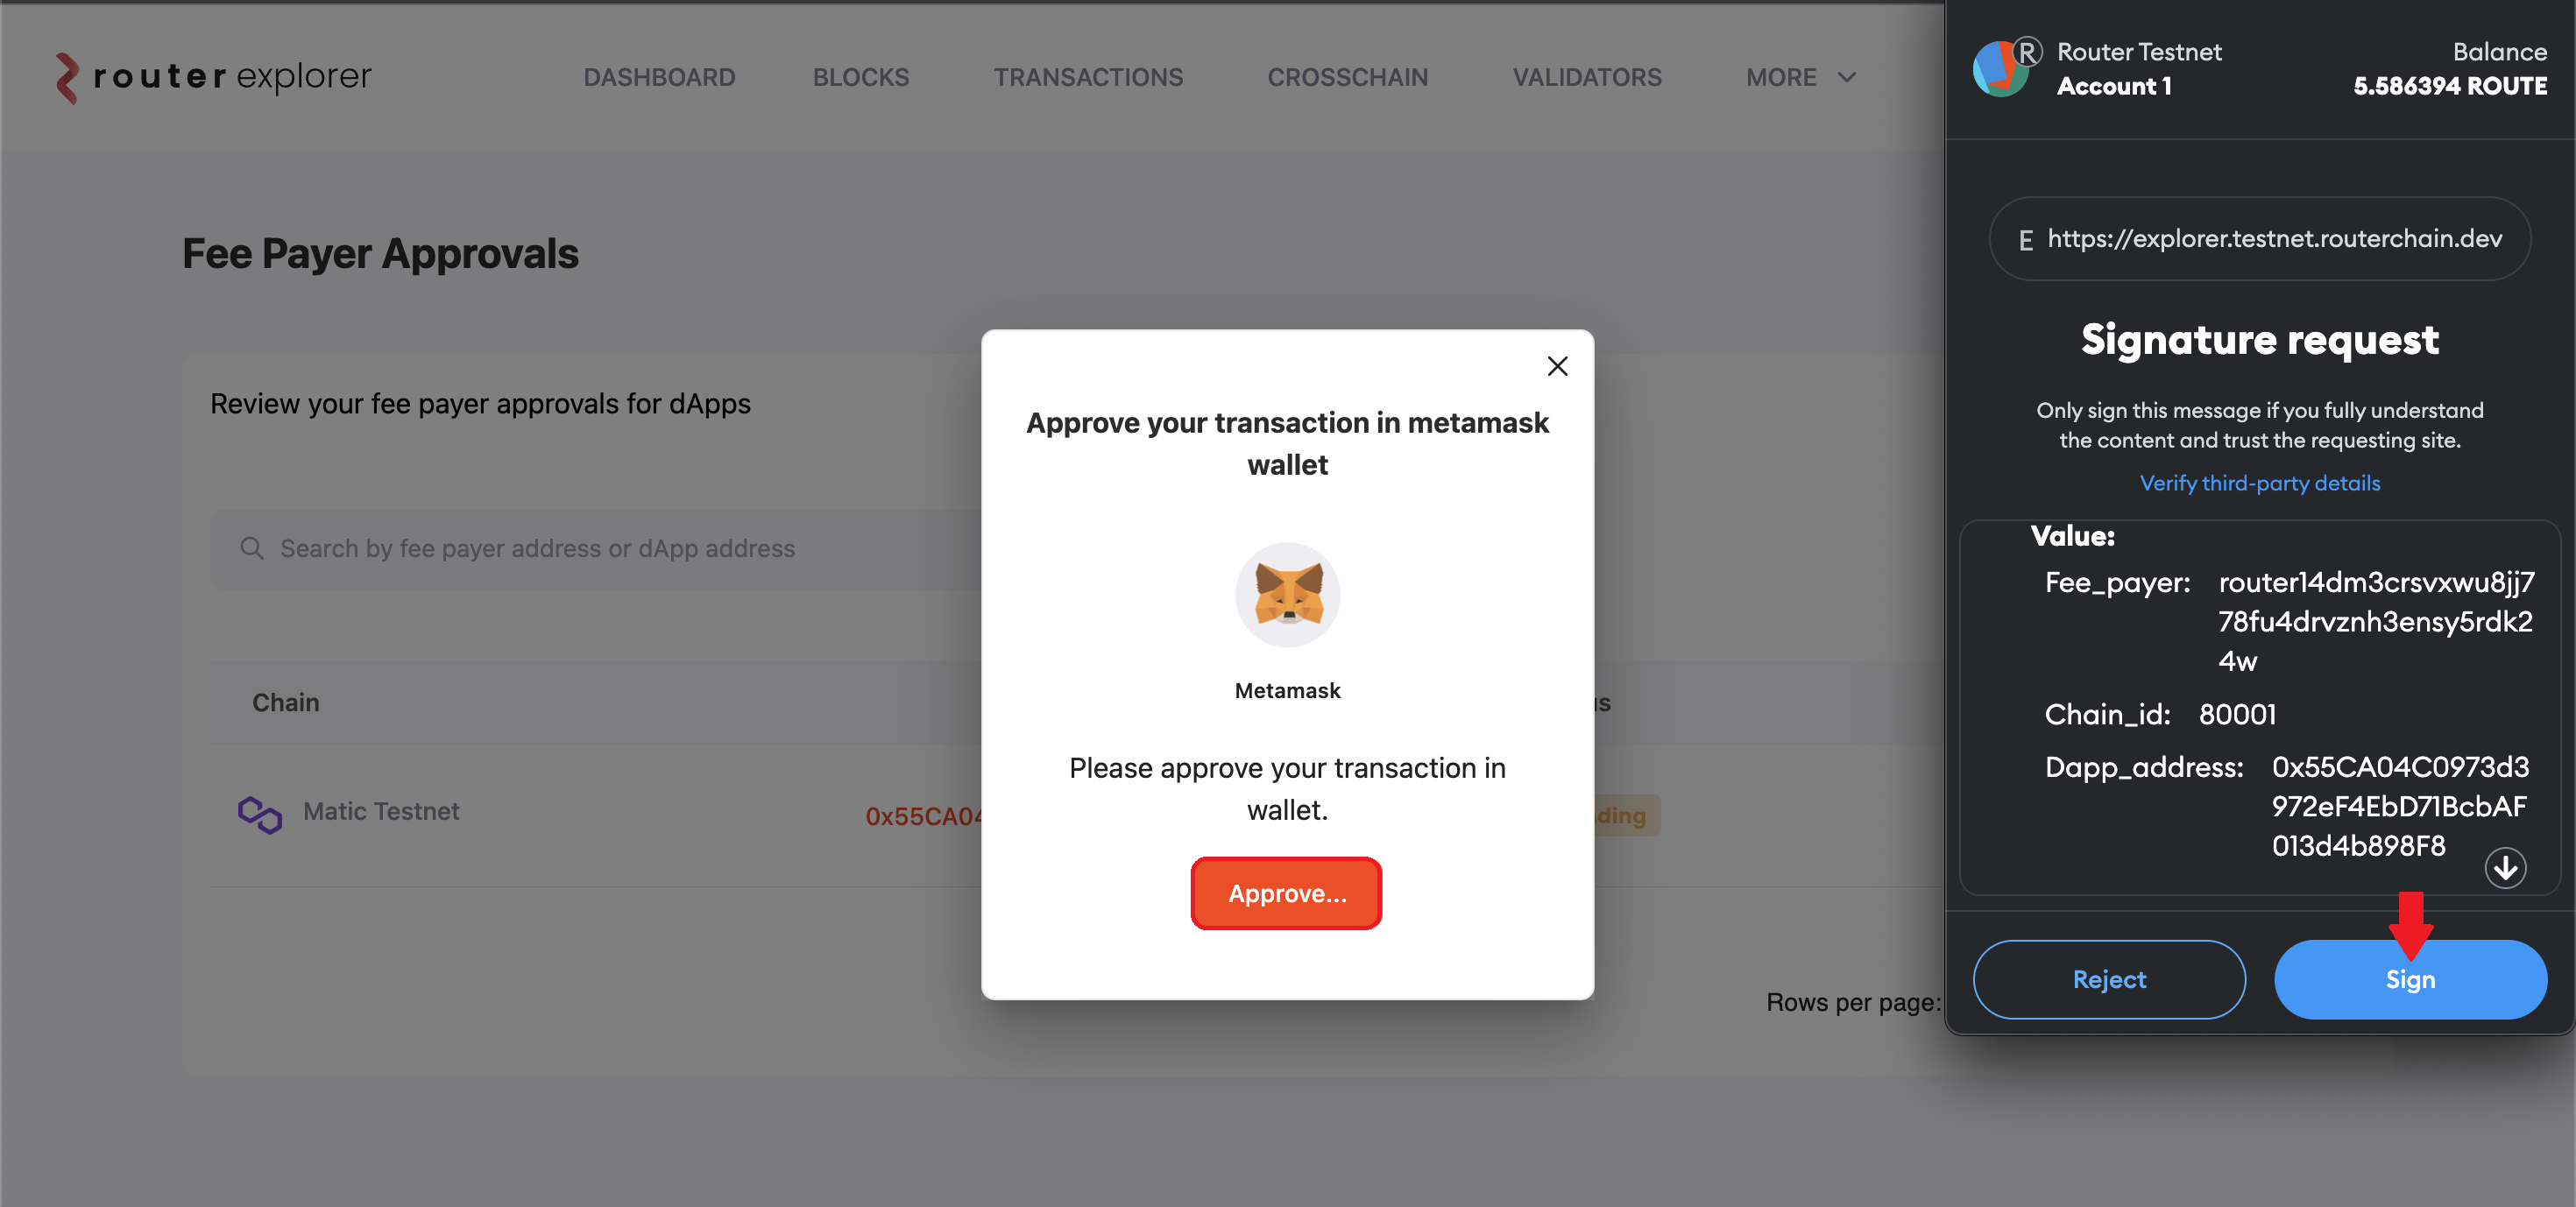
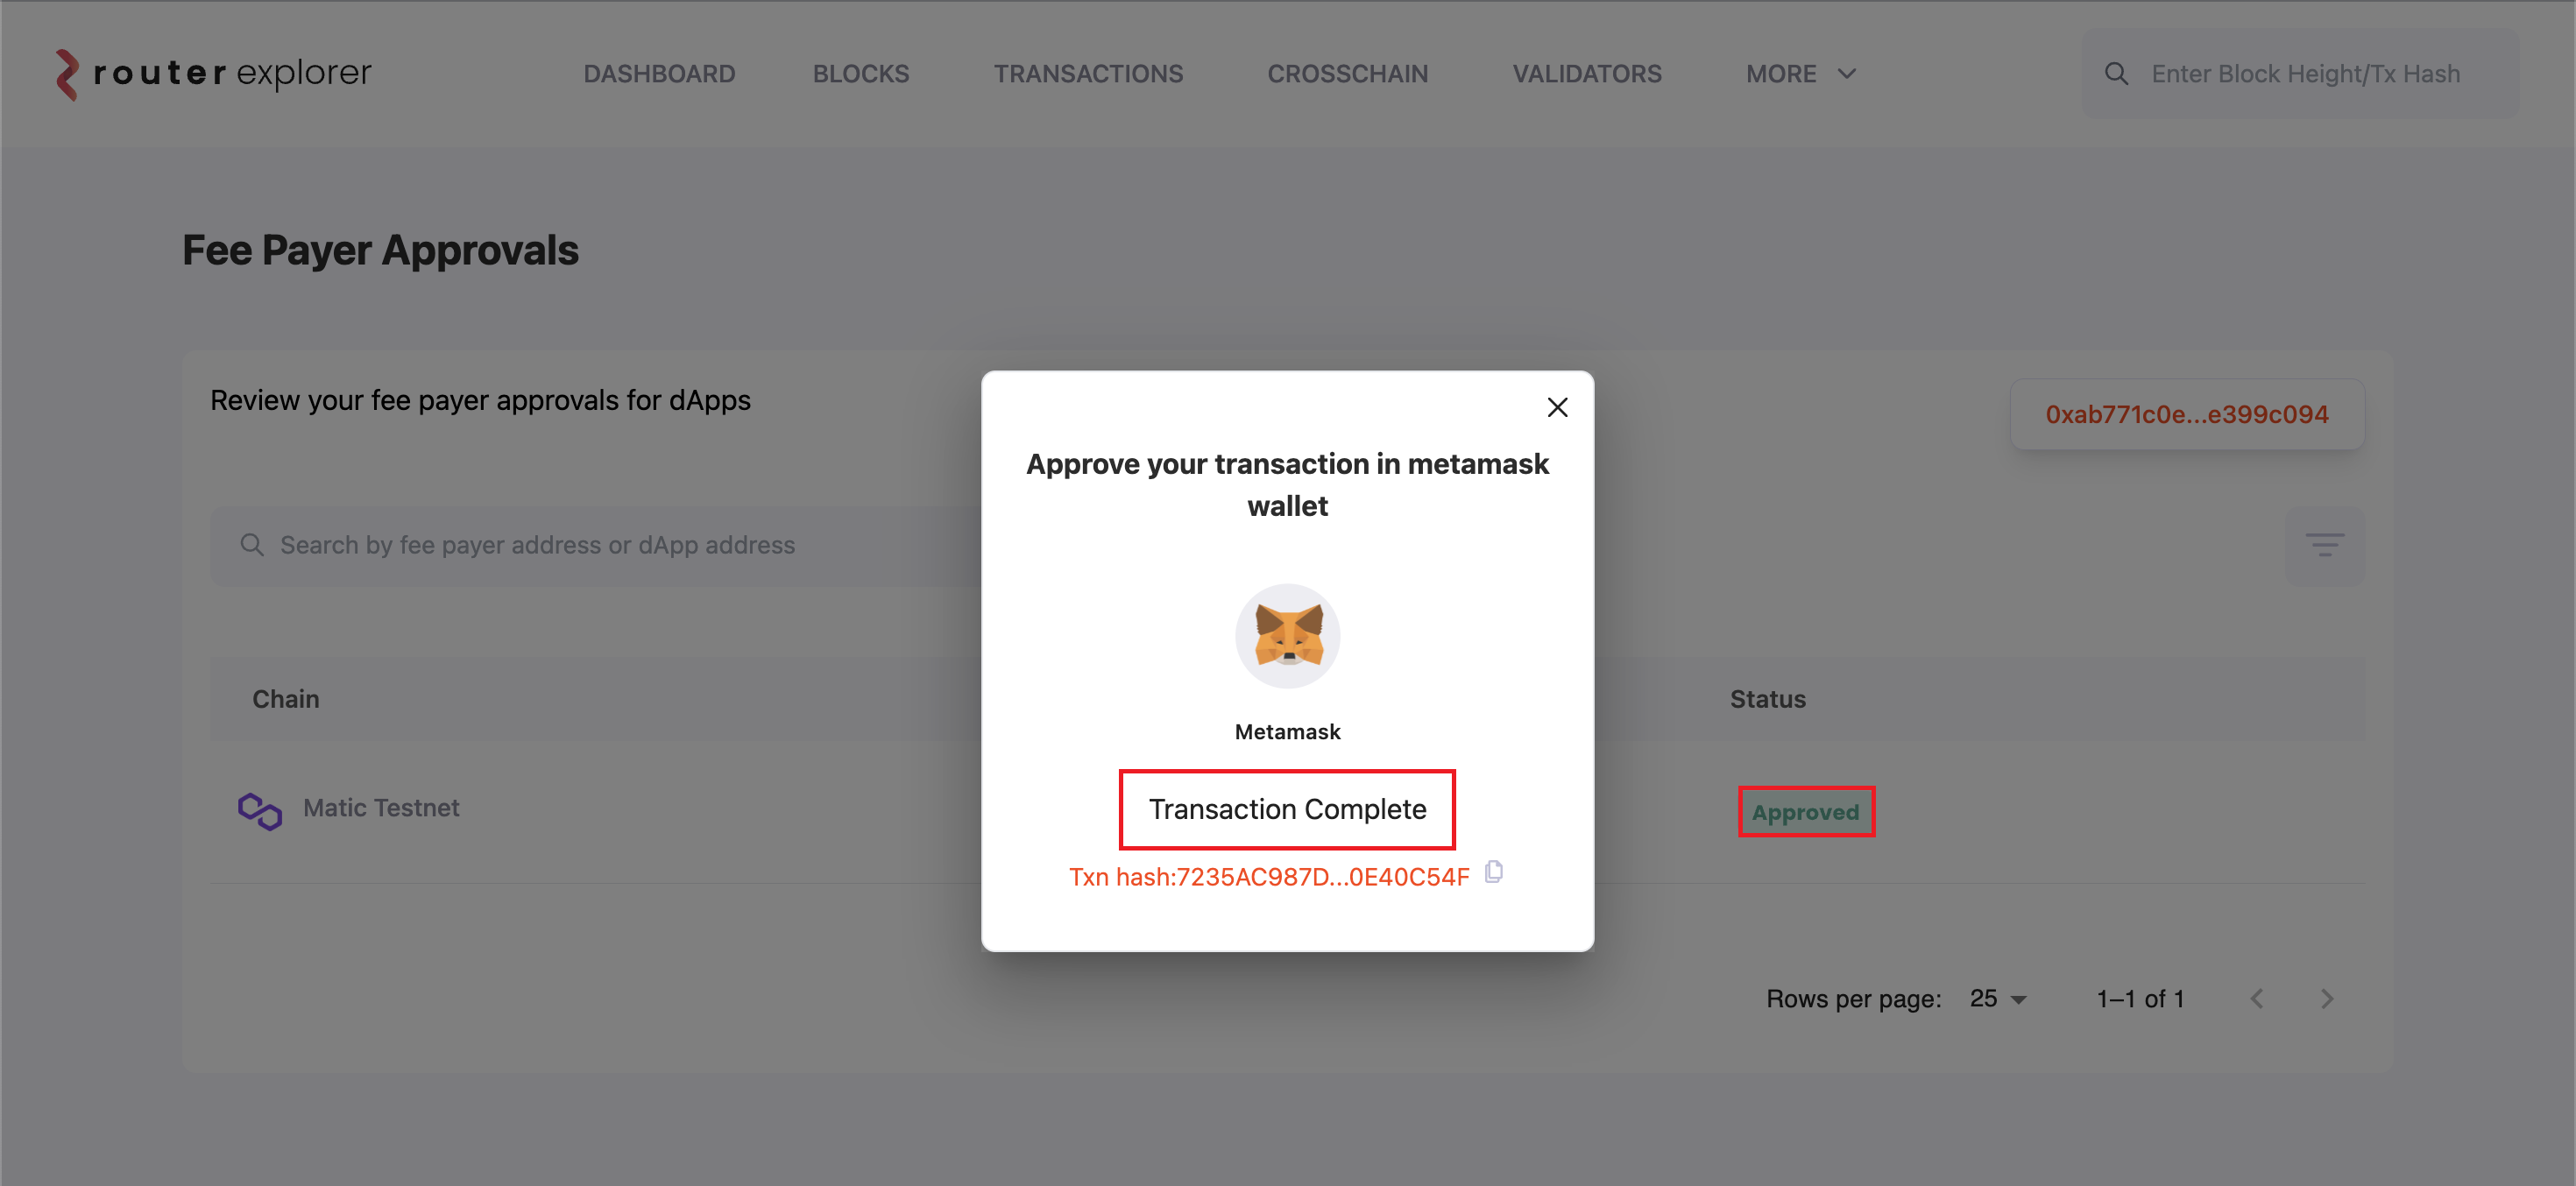
2) Approve your request on Router-explorer
Go to https://explorer.testnet.routerchain.dev/feePayer , connect your wallet and approve the pending request corresponding to your source dapp address.

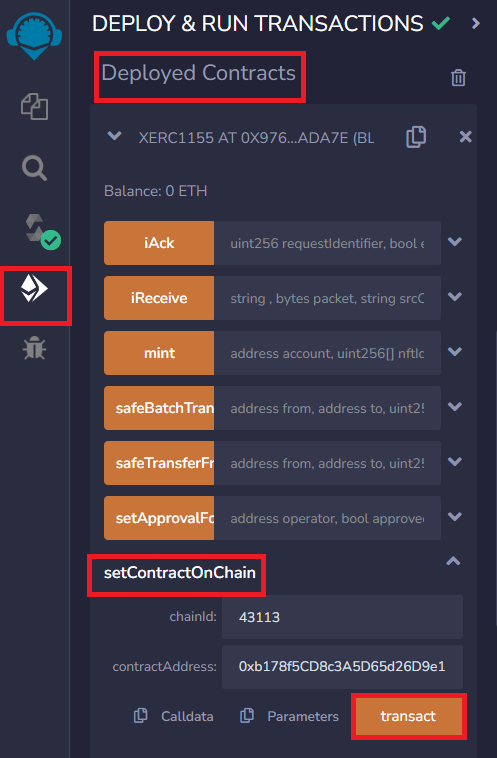
3) Set address for counterpart contract
Let's say you deployed your contract on Polygon Mumbai and Avalanche Fuji, you need to set the address of the contract deployed on Fuji onto the contract deployed on Mumbai and vice-versa using the setContractOnChain function.
STEP 5) Test your Cross-chain NFT Contract
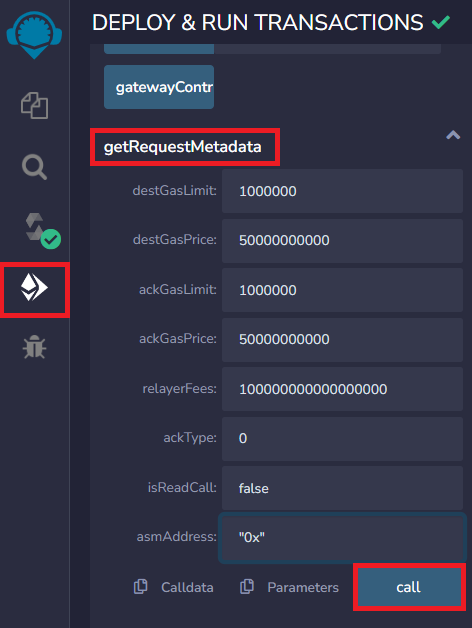
1) Get request metadata
This function gets you the metadata to be used while initiating a cross-chain transfer requestfrom source chain using transferCrossChain function. It includes gas limit for destination chain, gas price for destination chain, gas limit for source chain(ackGasLimit), gas price for source chain(ackGasPrice), relayer fees, acknowledgement type, bool if it is a read call and address for additional security module. To know more about request metadata parameters, kindly refer to this page.
Create the metadata like this:
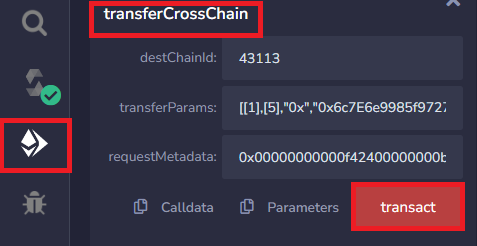
2) Transfer your NFTs crosschain
As explained earlier, transferCrossChain function is responsible for creating a cross-chain NFT-transfer request. It first burns the NFT from contract on source chain, utilises gateway contracts' ISend function to send request to mint the NFT to the user on the destination chain.
You need to call this function by putting the chain id for destination chain; tuple of transfer parameters that contain NFT ID to be transferred, amount of that NFT id, nft data and the address of the recipient of those NFTs on destination chain; and the request metadata that we created in previous step.
3) Track your transaction on Router Explorer
You can track the status of your transaction on Router Explorer
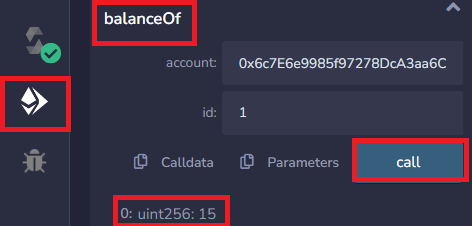
4) Successfully receive your NFTs on destination chain
After the transaction is successfully executed, you should now be able to see your updated NFT balance on destination chain.
To know more about message transfer via Router's Crosstalk , kindly refer to EVM-guides here.